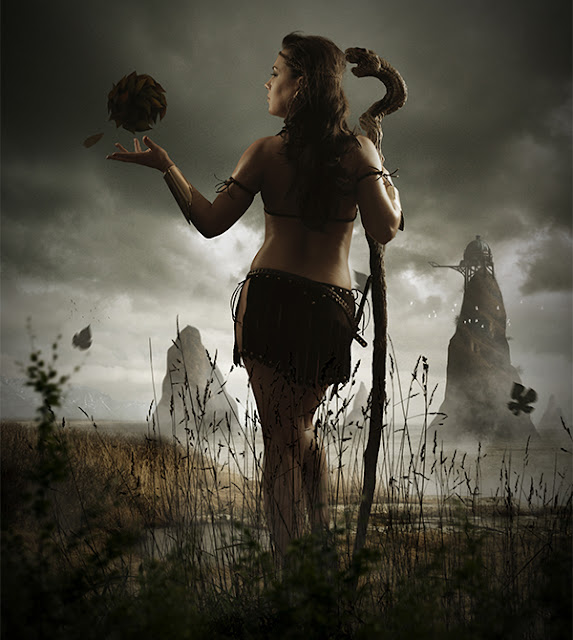
Step 11
In this step we are going to create the tower hill based on the concept created in the previous step.1) Cut a rough patch of the distant hill from the source image and import it on to the working canvas and then trim it in the shape of the concept outline.
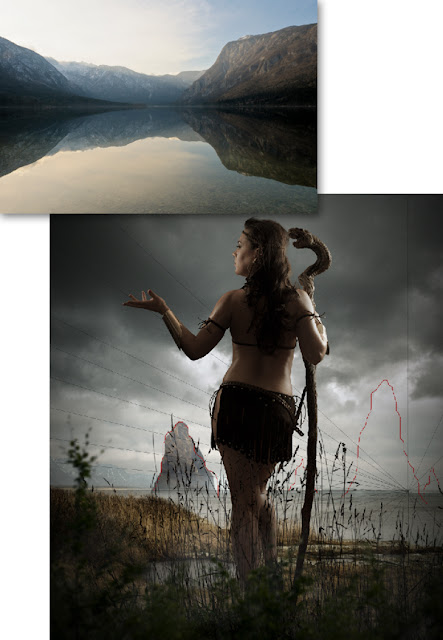
2) Create a new layer over the hill layer and paint dark shadow on the left side of the hill as shown.
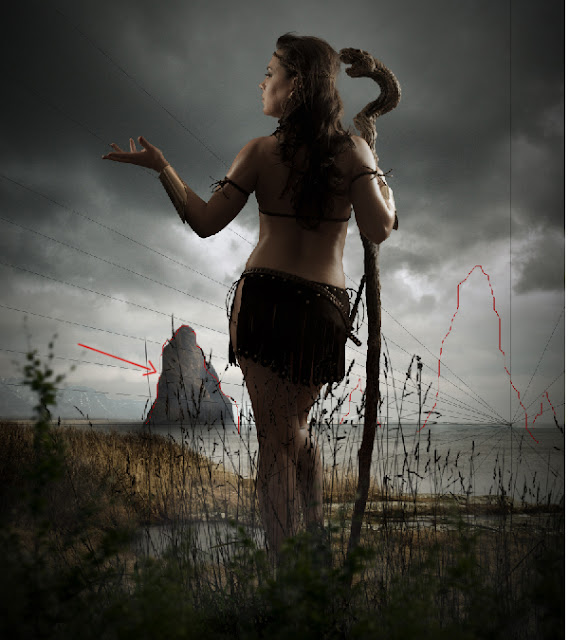
Step 12
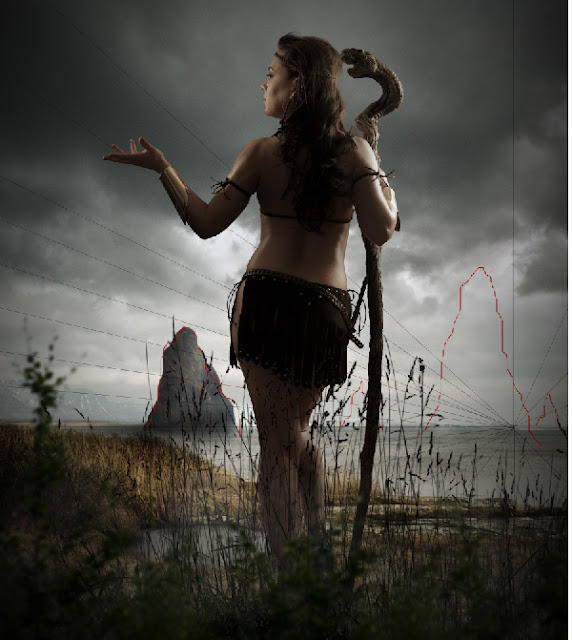
In this step we are going to create a reflection of the hill on the water surface.1) Duplicate the previously created hill and flip it vertically and place it as shown.
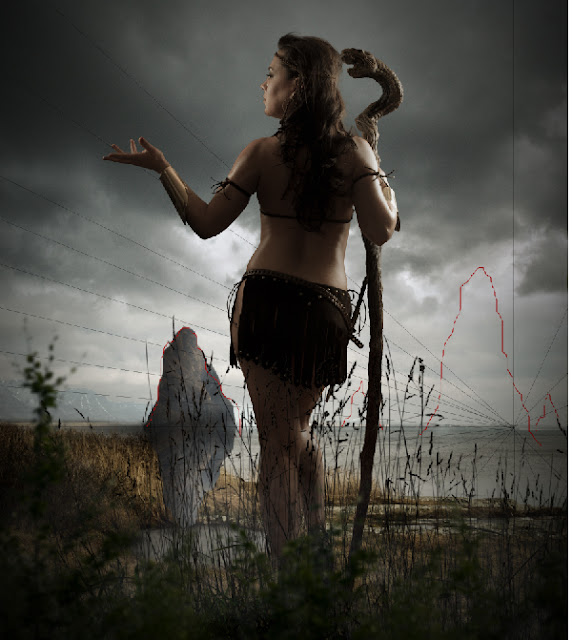
2) Now erase the inverted hill image as shown. The reflection might not be very clear in the scene, but every small detail covered can lead to a more believable outcome.
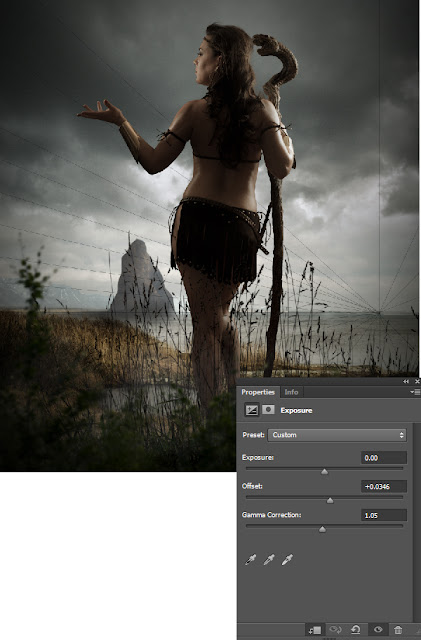
3) Now merge all the hill layers and add an Exposure adjustment layer to it and set the Offset level to +0.0346 and Gamma Correction level to 1.06.
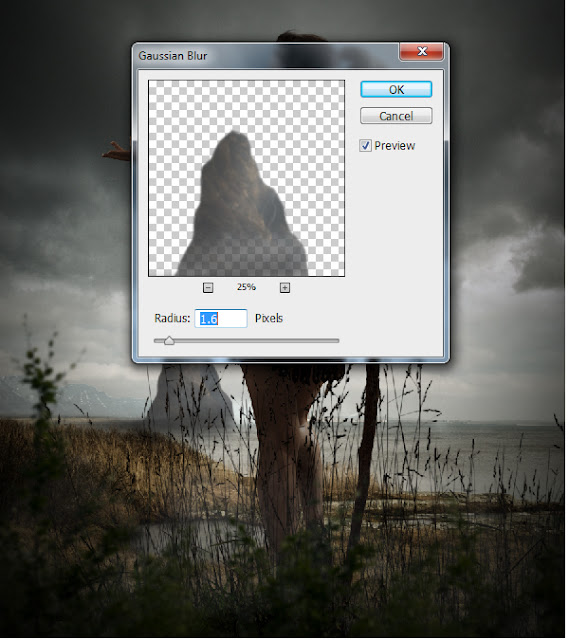
4) To add depth to the scene and hill, add a Gaussian Blur of Radius 1.6px.
Step 13
Similarly create a couple more of the tower hills as shown based on the concept sketch.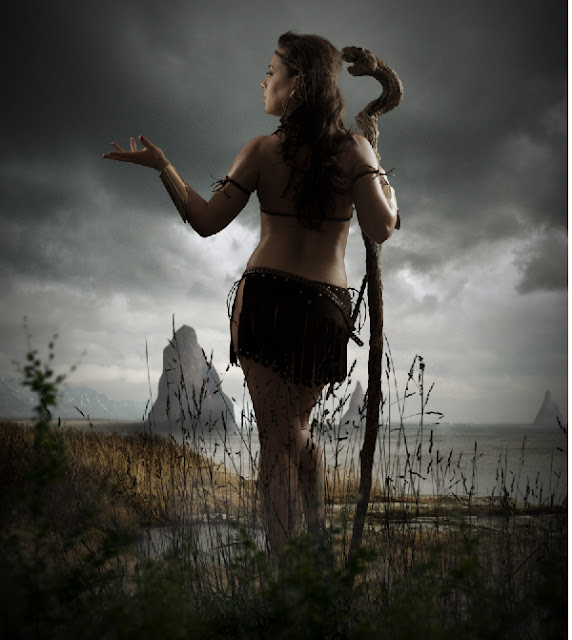
Step 14
Now create a new layer above the hills layers and paint thick fog as shown in the scene, using the fog brush.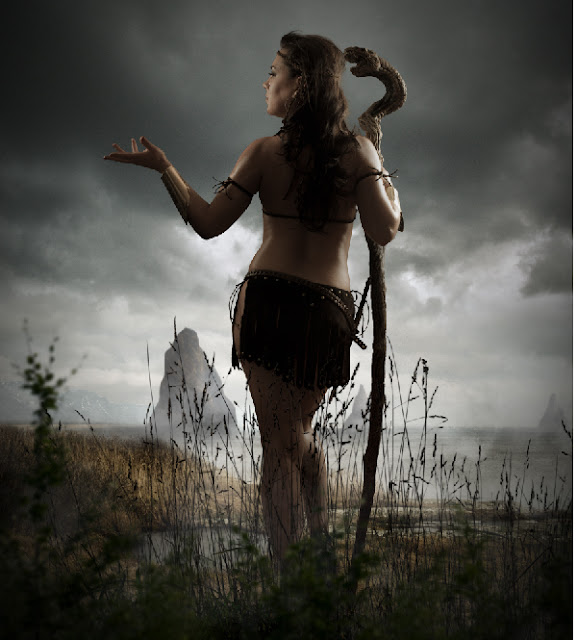
Step 15
In this step we are going to create another tower hill with an operating base on the top of the hill.1) Draw a rough sketch of the new tower hill in a new layer as shown.
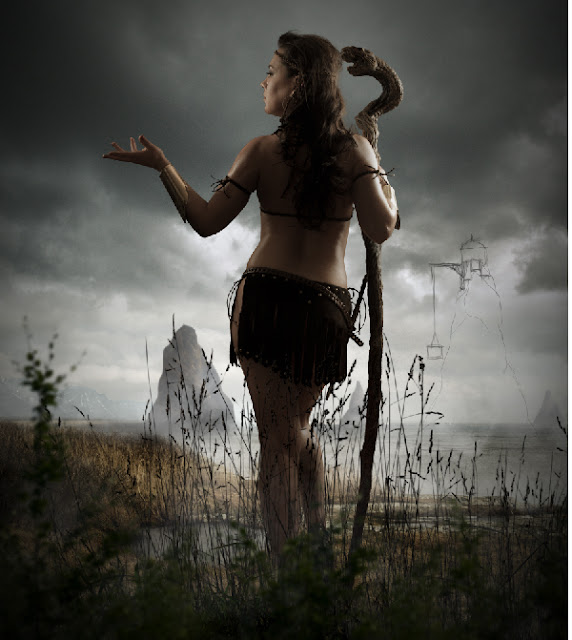
2) Now import the roughly cut texture of a hill and place it as shown in the scene.
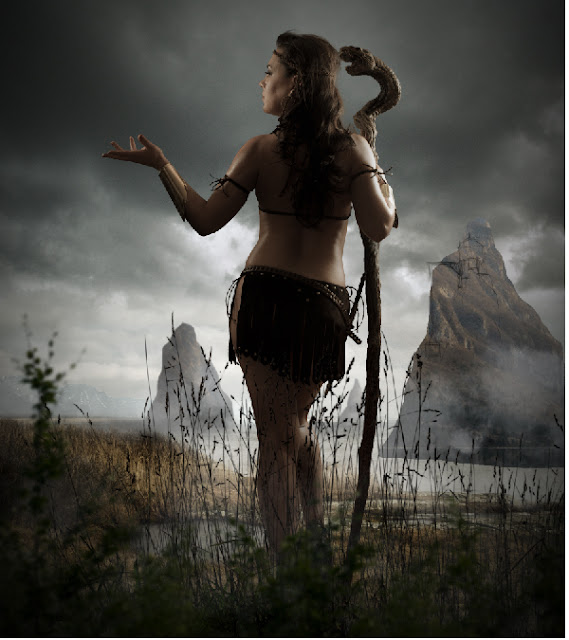
3) Using the Lasso Tool (L) cut the hill texture in the shape of the tower hill as per the sketch.
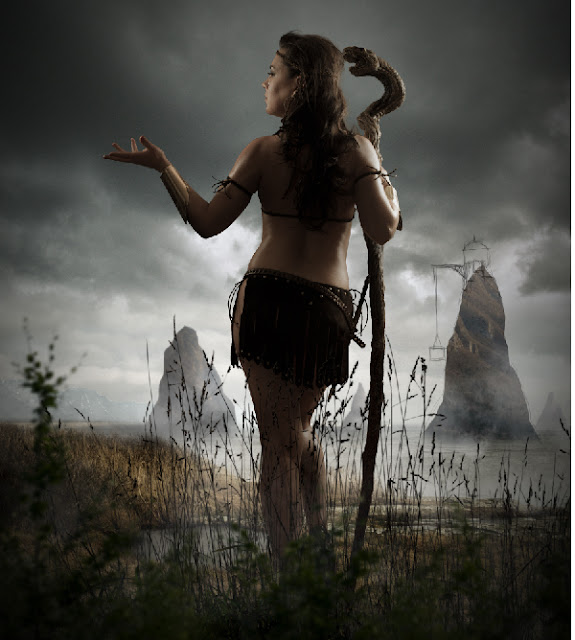
4) Create a new shadow layer on the top of the hill layer and paint the shadow as shown on the left side of the hill.
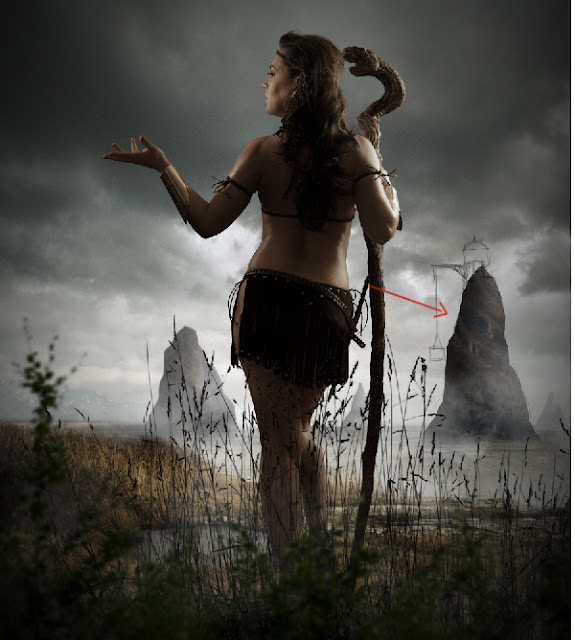
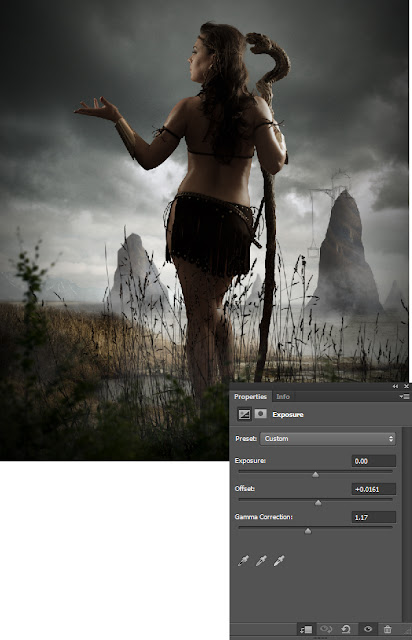
5) To make it blend with the environment create an Exposure adjustment layer to the tower hill and set the Offset level to +0.0161 and Gamma Correction level to 1.17.
Step 16
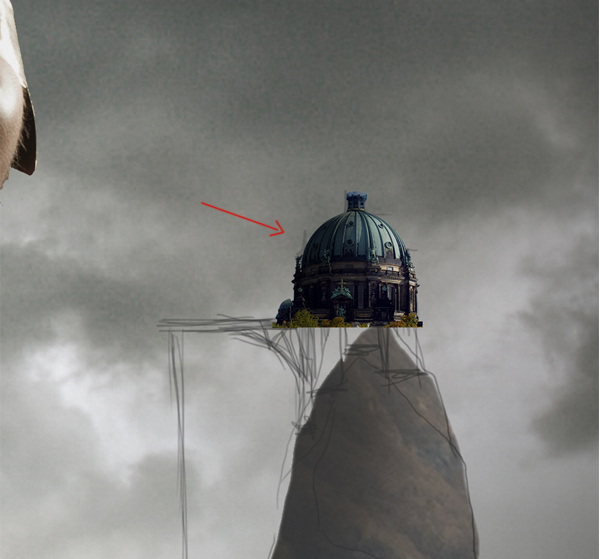
In this step we are going to create a dome on the top of the previously created tower hill.1) Cut the image of the dome from the source image using the Magic Wand Tool (W) and place it on the tower hill as shown.
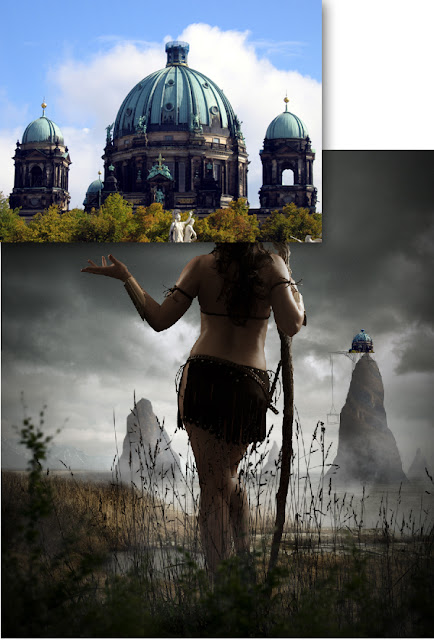
2) Now create a new layer over the dome layer and paint dark shadow on the left side of the dome as shown.
Step 17
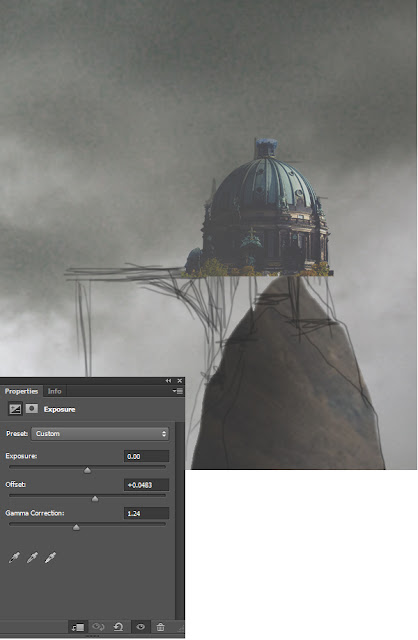
In this step we are going to color correct the dome to blend it with the environment.1) With the dome layer selected open the Exposure settings and set the Offset level to +0.0483 and the Gamma Correction level to 1.24.
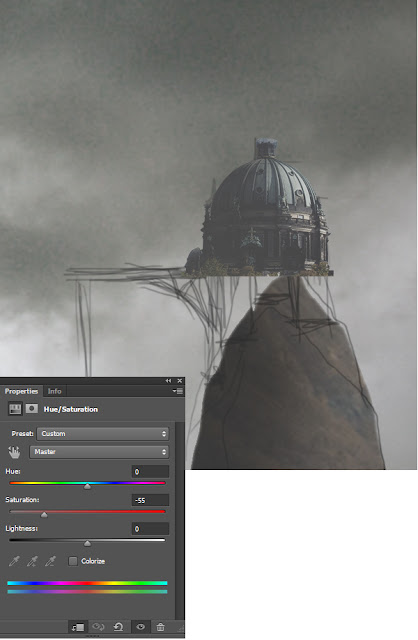
2) Using the Hue/Saturation de-saturate the dome by -55.
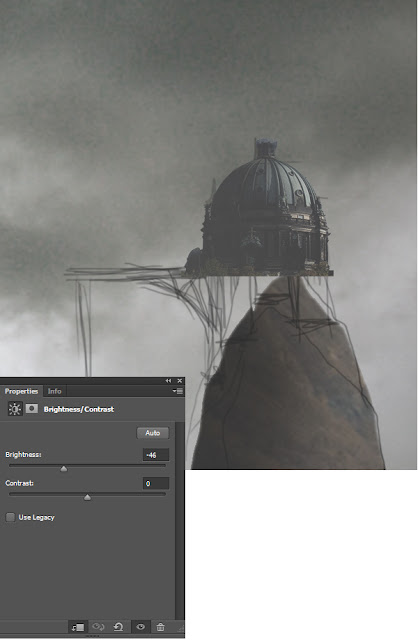
3) Also we don’t do not want the dome to be too bright, hence reduce the Brightness of the dome to -46 using Brightness/Contrast.
Step 18
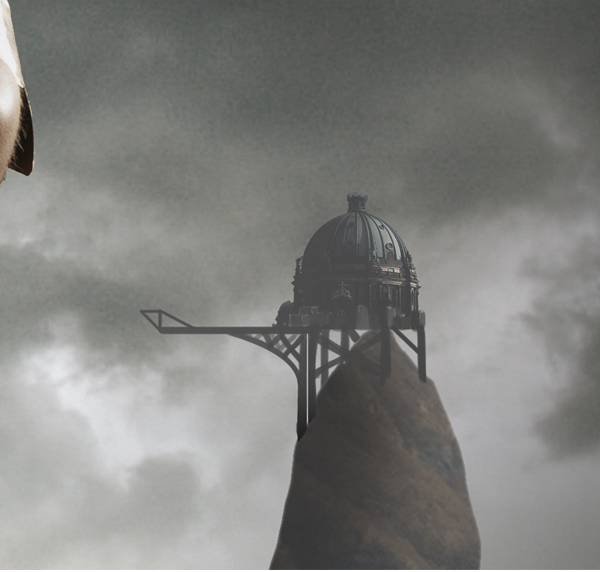
In this step we are going to paint the base structure of the dome. Which supports the dome on the top of the hill.1) Using the color #4d4d4d paint the base structure on a new layer as shown.
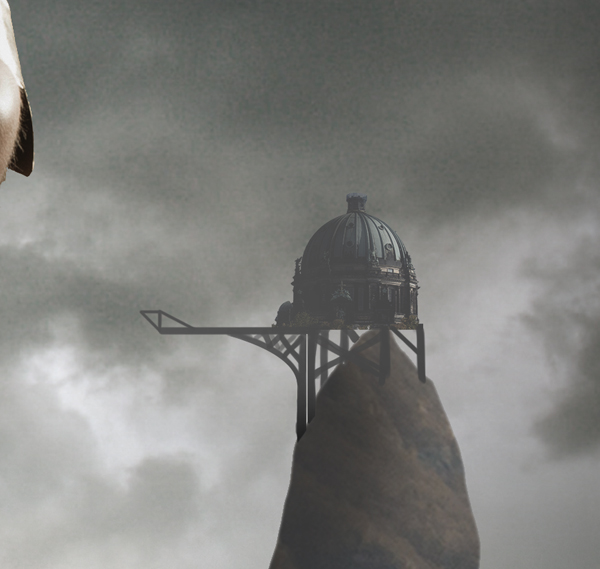
2) Now create another layer on top of the dome layer and paint few randomly placed box as shown. (The dome is actually a storage dock that collects supplies from the trade ships and stores there, till its necessary.).
Step 19
In this step we are going to add final details to the dome and the hill.1) Now paint some random bushes on the hill using the color # 50524f.
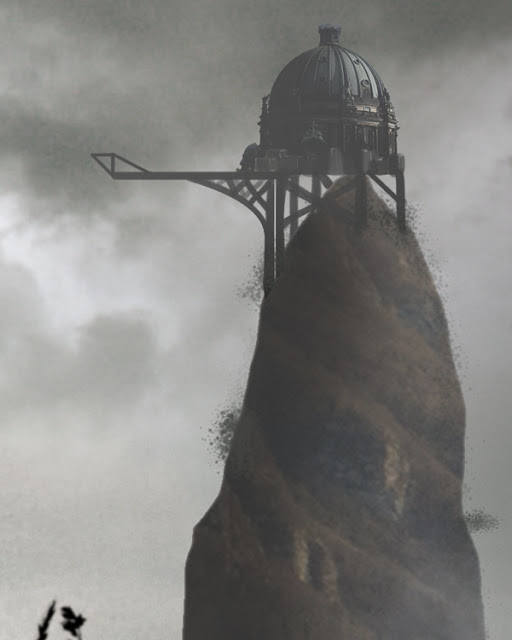
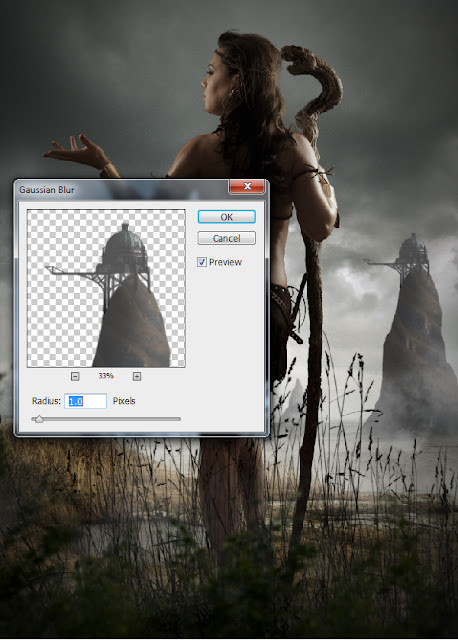
2) Now merge all the dome and hill layers together and add a Gaussian Blur of Radius 1.0px.
Step 20
In this step we are going to create a leaf ball floating just above the left hand of the model.1) Create a new layer over the model layer and paint a rough sketch of the leaf ball as shown.
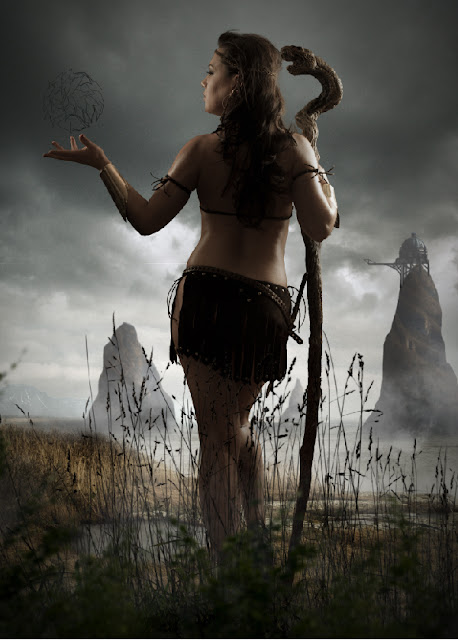
2) Now create another new layer under the sketch layer and paint the leaves of the ball as shown. This is a slight time consuming process but worth it.
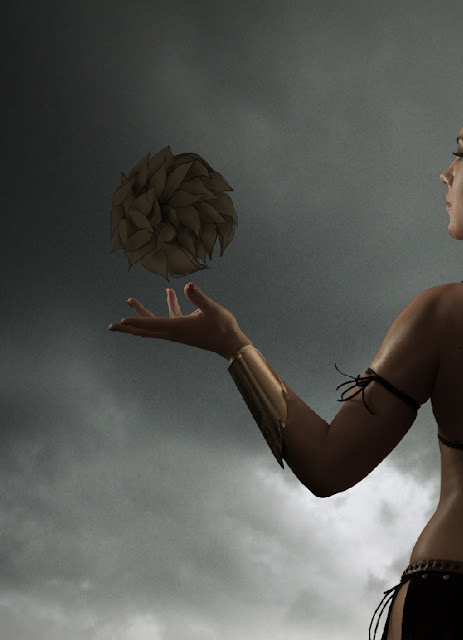
3) By using a soft round brush paint dark shadow on the left side of the ball as shown.
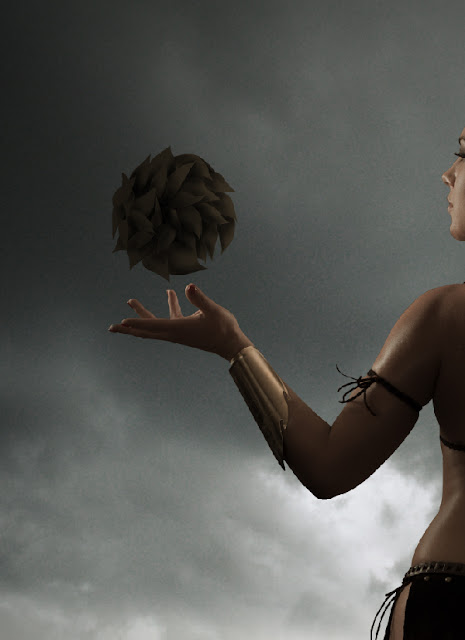
Step 21
In this step we are going to add texture to every leaf of the ball individually. This is the most time consuming process, but the out of it will make you forget of the time spent.1) Import the image of a leaf texture and place it on the leaf ball as shown.
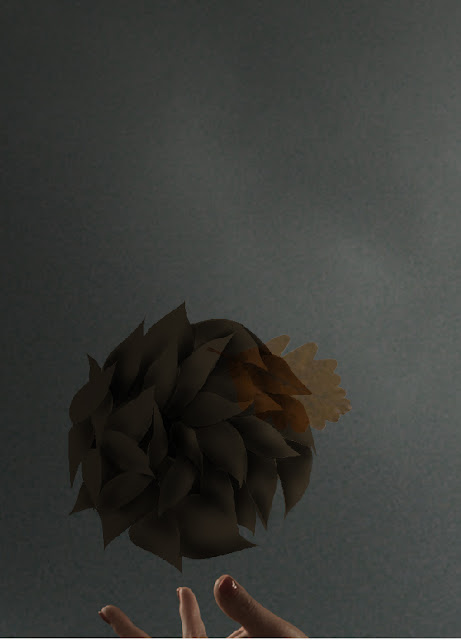
2) Now cut the leaf texture in the shape of the leaf of the ball.
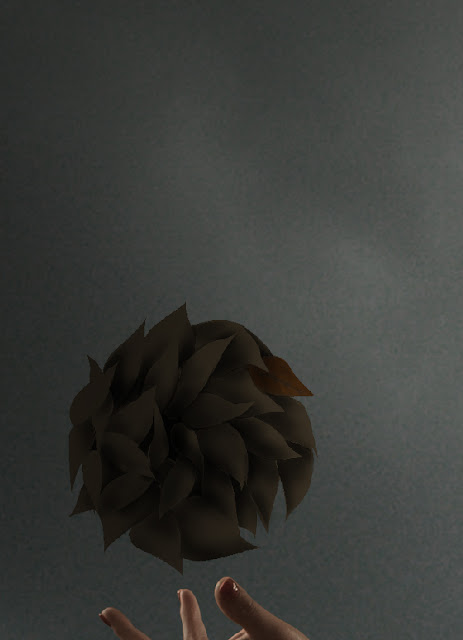
3) Follow the same procedure on every leaf and complete the texturing.
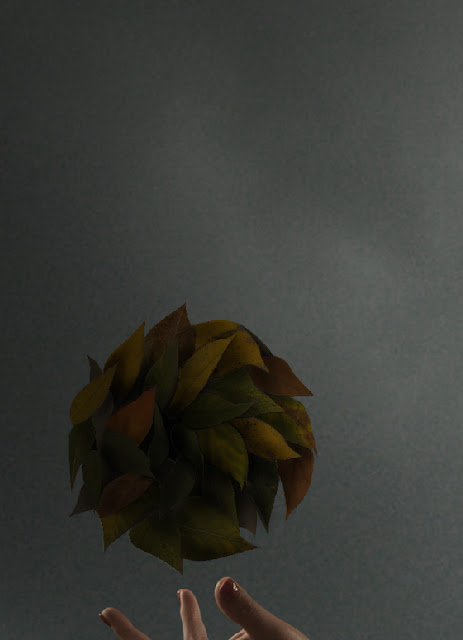
4) Group all the leaf ball layers including the textures into a folder and add an Exposure adjustment layer to it. Then set the Exposure level to -0.57 and Gamma Correction to 0.70.
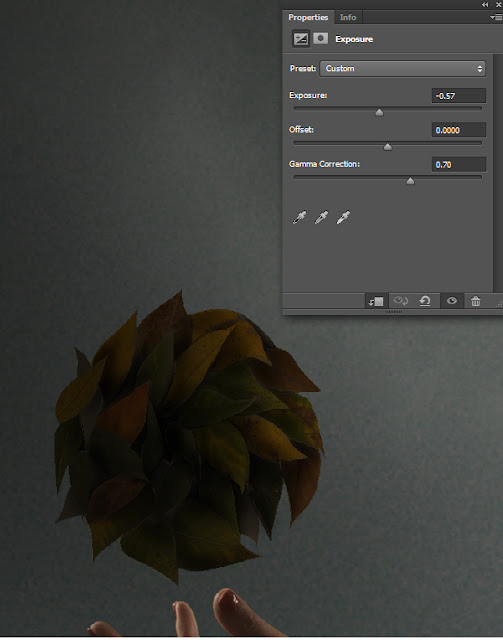
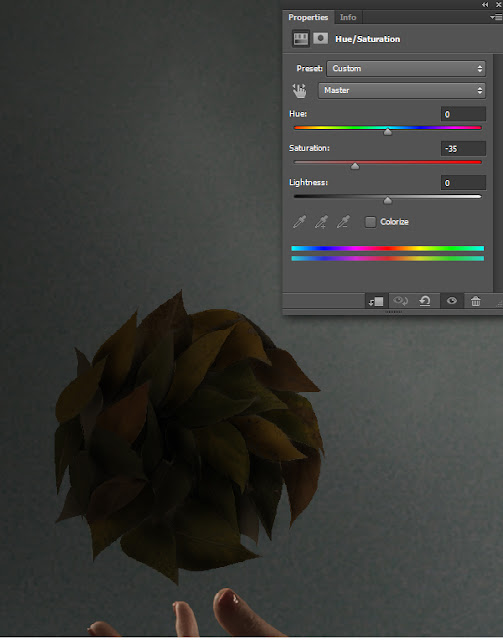
5) Now add Hue/Saturation adjustment layer to the folder and set the Saturation level to -35.
Step 22
Slightly reduce the intensity of the black in the scene by increasing the Offset value to +0.0023. It’s just a minor unseen detailing, which adds to a dramatic outcome in the end.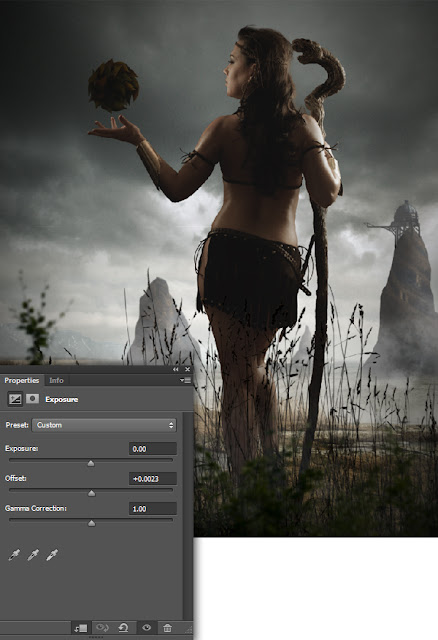
Step 23
In this step we are going to create leaves flying towards the leaf ball. To create an illusion, that the leaf ball is being formed by random leaves from the surrounds. Just like the Goku creates his energy ball in Dragonball Z.1) Import an image of a leaf on to the working canvas and place it on the left side of the scene as shown.
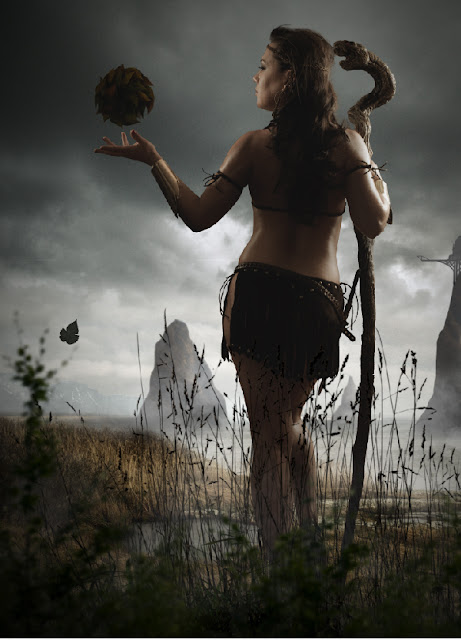
2) Since the leaf is flying towards the leaf ball, add a Motion Blur with Angle 60 and Distance 31px.
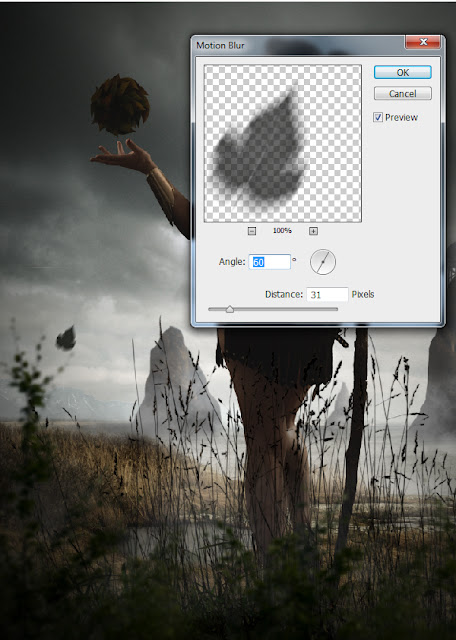
3) Now by using the Exposure settings set the Offset value to +0.0299. This will blend the leaf perfectly with the environment.
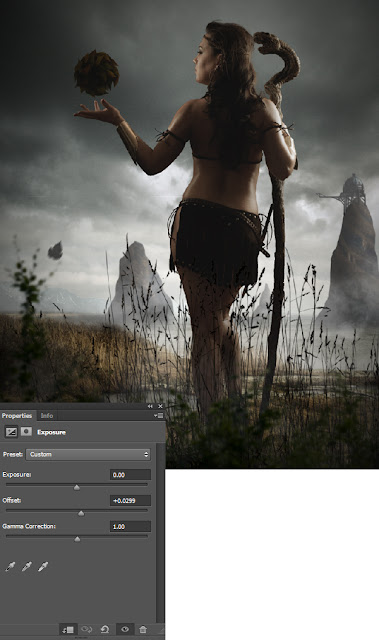
4) Similarly add few more leaves in the scene.
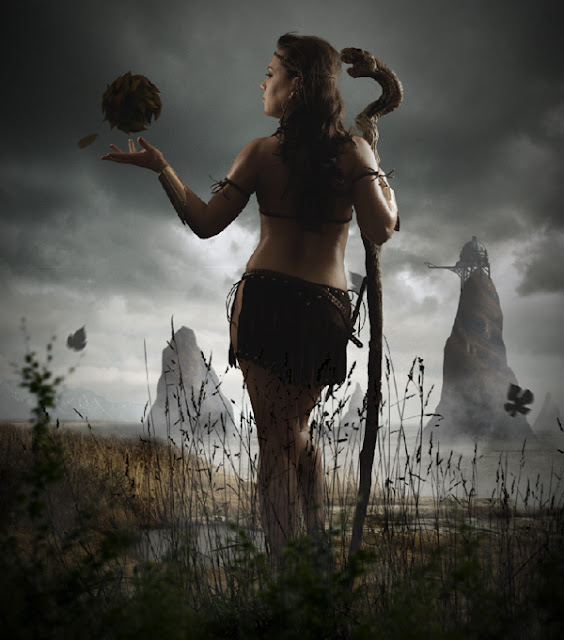
Congratulations, You’re All Done!
Awesome job making it this far! You should be proud of what you’ve created. Show it off to your friends and colleagues and get some feedback.


