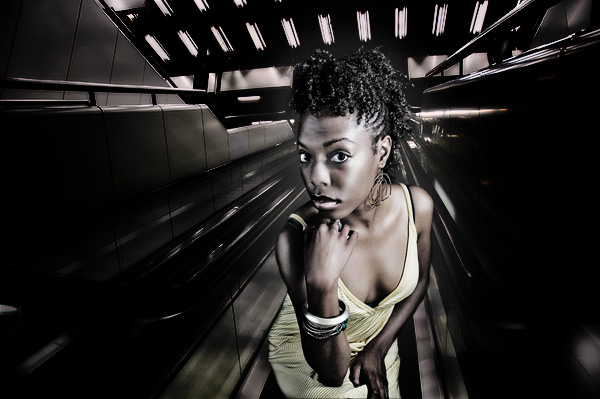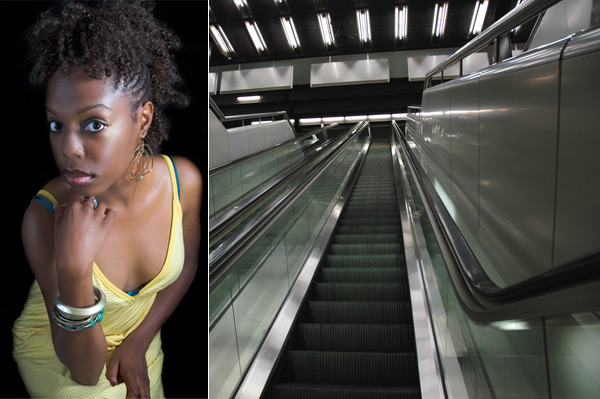
On his blog Joel Grimes acknowledged that he usually spends hours in Photoshop trying to create world of his illusions. Most of Joel Grimes photos consist of foreground person (it’s better to be black, because black just looks better with this technique) and HDR processed background. The big deal of Grimes workflow is proper lighting. In this Photoshop tutorial we take two free stock photos and try to recreate Grimes look.

The best thing about this Photoshop tutorial is that we’re working completely using adjustment layers and smart objects so at any time you can go back and tweak previous steps.
We’ll work on the girl photo first. Then we’ll process a background. In the last step we’ll combine two images together.
1. Convert your image to smart object. Layer -> Smart objects -> Convert to Smart object or Ctrl+F8.
2. Then apply Shadows/Highlights to highlight shadows. Image ->Adjustments ->Shadows/Highlights. Your image will look flat and low-contrast at this step. Every image is unique and you can experiment with the settings.

3. Decrease contrast (Layer -> New Adjustment Layer -> Brightness/Contrast) and then exposure (Layer -> New Adjustment Layer -> Exposure).

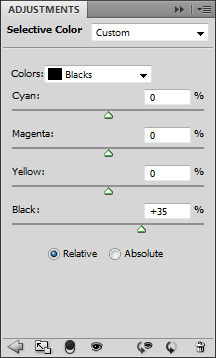
4. Apply Selective Color adjustment layer to make rich black color in the image. Layer -> New Adjustment Layer -> Selective Color.


6. Decrease saturation by applying Hue/Saturation adjustment layer. Layer -> New Adjustment Layer -> Hue/Saturation. Set Saturation marker to approximately -10 on Master, Red, and Yellow layer.

7. Merge all created layers on new layer (Shift+Ctrl+Alt+E). CAUTION: do not just merge all layers. Use Shift+Ctrl+Alt+E shortcut to create a NEW layer with merged all previously created layers. Convert this layer to smart object (Ctrl+F8). Apply Gaussian Blur Filter (Filter -> Blur -> Gaussian Blur) with radius 10 for large images or less for smaller ones. Change blending mode to Overlay and decrease transparency.

If you photo doesn’t have a proper Grimes look after this step yet, you can repeat steps 4 and 6.

10. Apply vignette to highlight the object and make the background darker in the corners.
I made Levels adjustment layer (Layer -> New Adjustment Layer -> Levels). To make image darker move the middle marker to the right. Make a mask using radial gradient to create a vignette.
final result


