
Photoshop Manipulation Tutorials: Polaroid Collage Effect
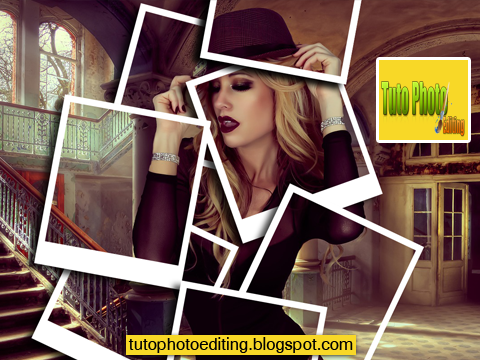
Turn any image into a collage of polaroids. We'll create a bunch of polaroid photos spread out on the background with the selected area of the image visible inside the polaroid photo. Follow these simple steps and I know you'll enjoy this. So let's start!
Step 1
Import your photo in Photoshop, then select the rectangular shape tool. Create a rectangle shape with the following settings width = 330 and height = 440.


Step 2
Duplicate the rectangle layer by pressing ctrl + j on your keyboard. and rename the Layers as shown. (Refer image below)

Step 3
Change the fill color of the "Border" layer to white. With the rectangle shape tool still selected hover over the top left and change the fill color to white.

Step 4
With the border layer selected press ctrl + t on your keyboard to use the free transform tool and resize our white border layer with the following settings: width = 364 and height = 410.

Tip: To input the exact size of the rectangle, just select the rectangular shape tool again and resize to a fixed ratio just above the workspace.
Step 5
Now we're going to apply layer styles to our layers. First select the "Border" layer and from the menu bar go to Layer > Layer Style > Drop Shadow. We will apply the below settings to our "Border" layer.

Step 6
Now select the "Image Holder" layer and from the menu bar go to Layer > Layer Style > Blending Options. We will apply the below settings to our "Image Holder" layer.

Now your polaroid frame should look something like this:

Step 7
Now from the layers panel, you're going to create a new group. Click the folder icon below the layers panel and place both "Image Holder" and "Border" layer inside that folder group. Rename the folder as Polaroid.

Step 8
Just above your Background photo we will be inserting a solid color fill this will fill your image with a background color except for the Polaroid image holder which will enable you to see through your image.
From the layers panel select the create new fill or adjustment layer and select solid color.
Step 9
Now for the fun part, we'll select the Polaroid folder and press ctrl + j and start positioning your Polaroid collage. To change the solid fill color just select first the solid color layer and from the menu bar go to Layer > Layer Style > Color Overlay from there you can adjust your color preference.
Tip: Press ctrl + t to toggle free transform tool and rotate the images to your liking.
Change the fill color of the "Border" layer to white. With the rectangle shape tool still selected hover over the top left and change the fill color to white.
Step 4
With the border layer selected press ctrl + t on your keyboard to use the free transform tool and resize our white border layer with the following settings: width = 364 and height = 410.
Tip: To input the exact size of the rectangle, just select the rectangular shape tool again and resize to a fixed ratio just above the workspace.
Step 5
Now we're going to apply layer styles to our layers. First select the "Border" layer and from the menu bar go to Layer > Layer Style > Drop Shadow. We will apply the below settings to our "Border" layer.
Step 6
Now select the "Image Holder" layer and from the menu bar go to Layer > Layer Style > Blending Options. We will apply the below settings to our "Image Holder" layer.
Now your polaroid frame should look something like this:
Step 7
Now from the layers panel, you're going to create a new group. Click the folder icon below the layers panel and place both "Image Holder" and "Border" layer inside that folder group. Rename the folder as Polaroid.
Step 8
Just above your Background photo we will be inserting a solid color fill this will fill your image with a background color except for the Polaroid image holder which will enable you to see through your image.
From the layers panel select the create new fill or adjustment layer and select solid color.
Step 9
Now for the fun part, we'll select the Polaroid folder and press ctrl + j and start positioning your Polaroid collage. To change the solid fill color just select first the solid color layer and from the menu bar go to Layer > Layer Style > Color Overlay from there you can adjust your color preference.

Tip: Press ctrl + t to toggle free transform tool and rotate the images to your liking.


