
Welcome
to this tutorial, in the latter we will learn how to make up a face of how Gene
Simmons Makeup group using photoshop .
And here is the preview of the final
result

To
start the work open the
image of our model in a new document.

Then
go to Menu> Layer> Duplicate Layer (do not duplicate the layer directly
with the shortcut Ctrl + J to duplicate because we are going into
a new document).

Put
yourself on the new document in our tutorial is " distortion
" and then
apply above a Gaussian blur filter of 5 pixels by going to Menu>
Filter> Blur> Gaussian Blur

Then
save your document " .PSD " and put it in the office because we
will use it later

Returning
to our main working document then duplicate your layer twice by pressing ( Ctrl
+ J ) and not get
lost in later layers, name them face1 andface2

Put
yourself on the layer face2 and desaturate it by pressing Ctrl
+ Shift + Uor by going to Menu> Image>
Adjustments> Desaturate

Then,
change its blending mode to product

Next,
click the eye next to the layer face2 for then hid put yourself on the layer face1

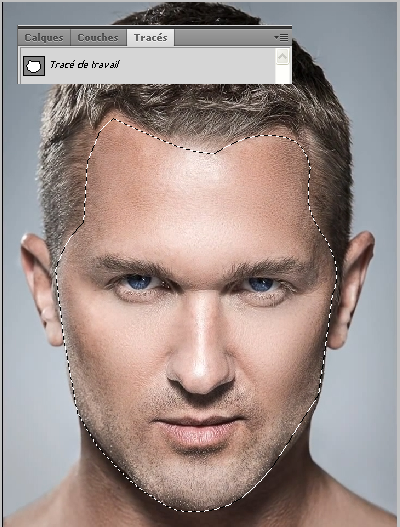
We
will make a selection around the face to isolate for white makeup to do, take the
pen tool (P) and
do the following plot.

Then
go to the tab layout hold the down
Ctrl and click on
the route that you drew.
Now
go to Menu> Select> Refine Edge . And
enable dynamic rays then pass made

Then
simply move the brush on the outline of the hair roots as below, and release.
Then
go to Menu> Select> Save
Selection and
name the Face Select and deselect the face by pressing Ctrl
+ D

Import
the form provided in the top pack in your document, or draw the shape you want
by using the pen tool (P) mode shape layer .

Take the
pen tool (P) mode shape
layer and draw
the following form.

Similarly
draw another shape up.

Merge
the three forms ( Ctrl + E ), name the layer " face3
" and pick
the face selection by going to Menu> Select> Load
Selection and
choose Selection earlier.


Then
invert the selection by going to Menu> Select> Inverse and press the Delete button on your
keyboard to better embed the form with the face.
Then,
change its blending mode to soft light

Put
yourself on the layer " face1 "

And
add an adjustment layer Hue and saturation clip mode ( Menu> Layer> New
Adjustment Layer> Hue and Saturation ).

After
always in clip mode, add a Levels adjustment layer ( Menu>
Layer> New Adjustment Layer> Levels ).

Then
put yourself on the layer " face3 " (the black shape) and go to
Menu> Filter> Distort> Displace

And
select the PSD file named previously " deformation
"


Then
grab the eraser tool (E) and erase imperfections on the nose
and eyes.

Put
yourself on the layer " face2 " and move it below the layer
" face3 " if this is not done then click the eye
next to the layer thumbnail to view it

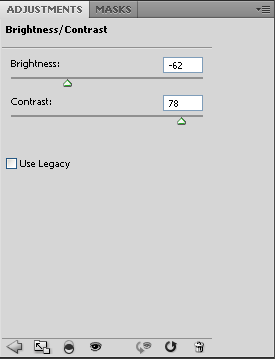
Then
add an adjustment layer Brightness and Contrast in clip mode ( Menu>
Layer> New Adjustment Layer> Brightness and Contrast ).

Then,
hold down Ctrl and click on the thumbnail of the
"layer face3 " to recover its selection.

Put
yourself on the "layer face2 " and go to Menu>
Layer> Layer Mask> reveal selection.

After,
get the face selection by going to Menu> Select> Load
Selection and
choose Selection earlier.

Then,
hold down Ctrl + Alt down and click on the layer thumbnail
" face3 "to
remove the selection.

Put
yourself on the "layer face1 " and go to Menu>
Layer> Layer Mask> Leave the selection appear.


Then
add an adjustment layer curve by going to Menu> Layer> New
Adjustment Layer> Curves


Finally, add an adjustment layer curve and adjust the RGB
curve like this

And
here's the final result


