How to Create Happy New Year 2017 in Photoshop
In this tutorial, I will show you how to Create Happy New Year 2017 text effect. We’ll be using gradient overlay, pattern overlay styles and combining different techniques to create a fiber background.
Final Results

How to Create Happy New Year 2017 Step 1
Create a new document (Ctrl+N) in Adobe Photoshop with the size 1920px by 1200px (RGB color mode) at a resolution of 72 pixels/inch. Select then the Paint Bucket Tool (G) to fill the new background layer with #353430 color.

> How to Create Happy New Year 2017 Step 2
To create a fiber background we’ll download Spiderman Pattern from brusheezy.com. Copy the pattern file and paste it into, C:/Adobe/Photoshop/Presets/Patterns. Then create a new layer and fill this layer with #959595 color using Paint Bucket Tool (G).

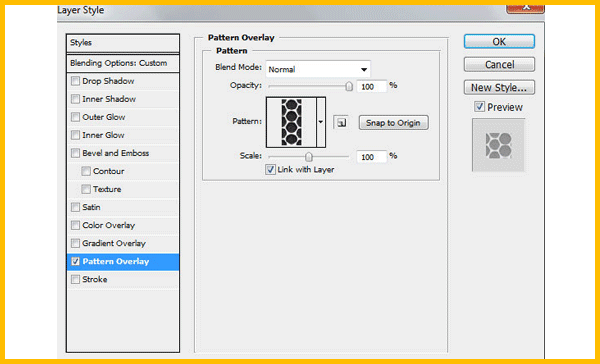
Set Opacity to 41% for this layer and click to Add a layer style icon from bottom part of the Layers panel and select Pattern Overlay. Go to Pattern Picker, and additional Spiderman Pattern can be added by loading them from the Picker’s submenu.
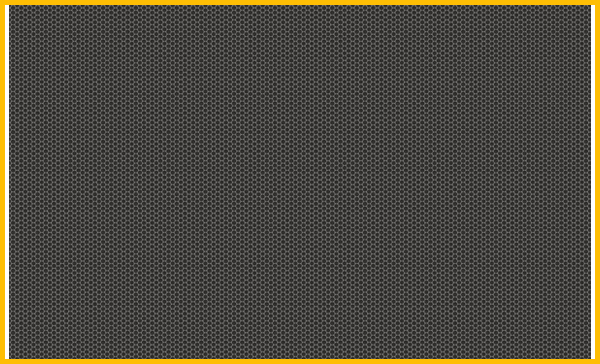
We’ve got the next fiber background:
> How to Create Happy New Year 2017 Step 3
Click on the same layer on the bottom part of the layers’ panel on Add a Mask icon and choose a Soft Round brush of black color from Brush Tool (B)( set the Opacity to 15% in Options bar)
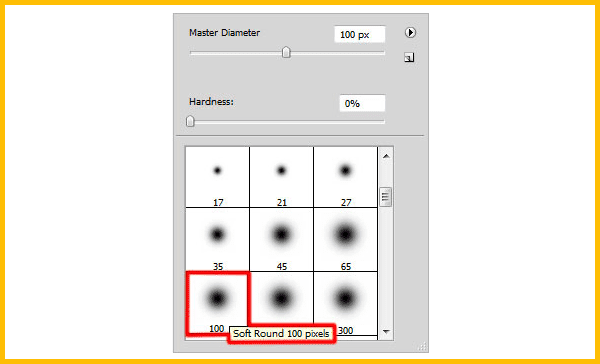
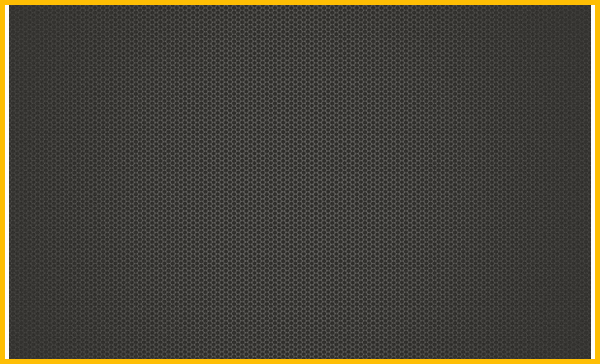
Use Soft Round brush to clean out a little the picture’s edges:
How to Create Happy New Year 2017 Step 4
Make a copy of the last made layer, set the Fill to 0% and click Add a layer style icon from bottom part of the Layers panel to select Gradient Overlay:

Click in the color bar to open the Gradient Editor and set the color stops as shown. Click OK to close the Gradient Editor dialog box.
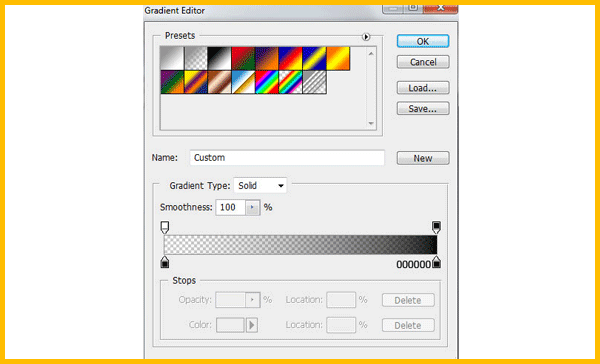
We’ve got the next effect on background:

How to Create Happy New Year 2017 Step 5
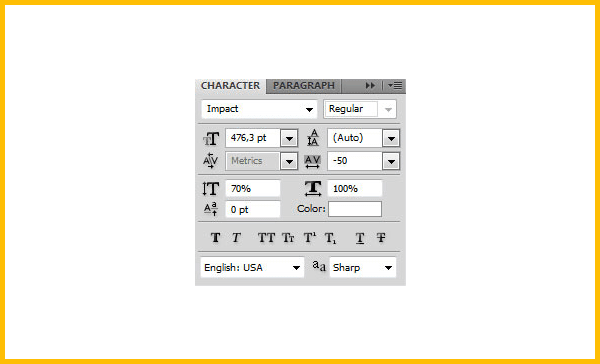
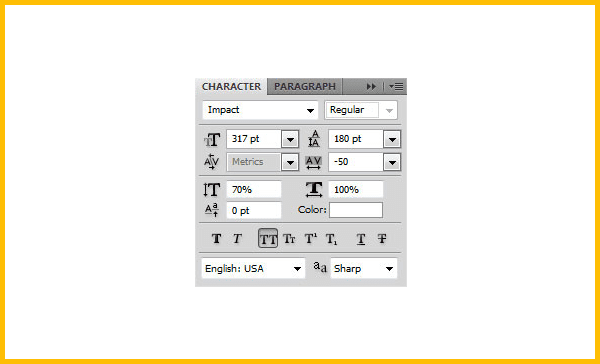
Click the Horizontal Type tool (T). Select a font, size and color in the Character panel.
How to Create Happy New Year 2017 Step 6
Click in the image and type HAPPY NEW YEAR 2010 text. Press Enter to apply the text.

How to Create Happy New Year 2017 Step 7
Click on Add a layer style icon from bottom part of the Layers panel and select Drop Shadow:
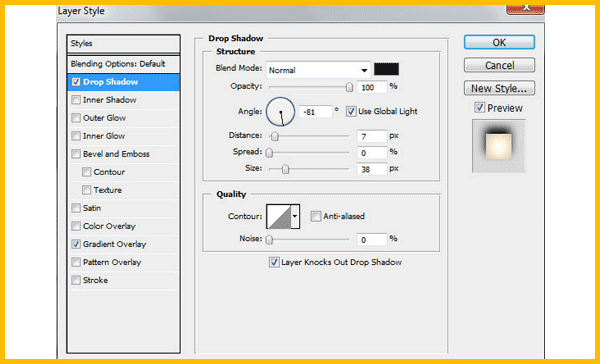
Also set the Gradient Overlay
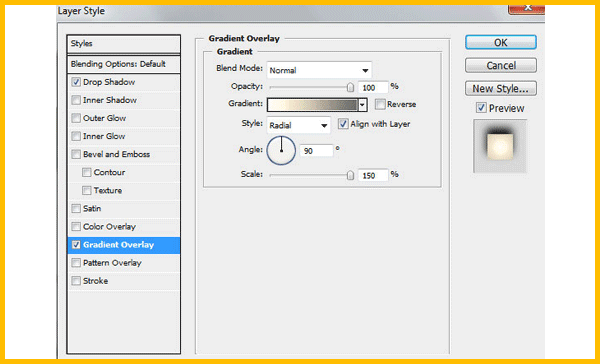
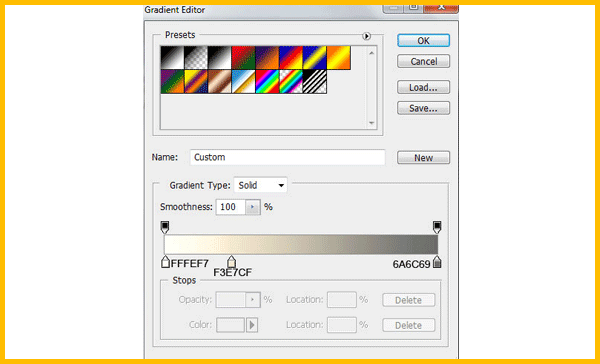
Click in the color bar to open the Gradient Editor and set the color stops as shown. Click OK to close the Gradient Editor dialog box.
We’ve got the next greetings text:

How to Create Happy New Year 2017 Step 8
Using the Free Transform (Ctrl+T), we can incline the text a little to give it the same look as on the next picture:
