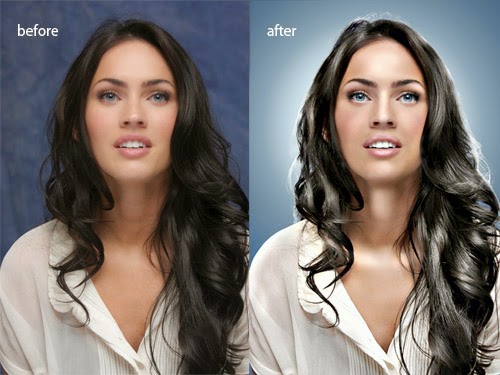
In many of Greenberg’s photos you see a simple single colored background with a vignette of light coming from the center. It is possible to create Jill Greenberg effect solely with Photoshop tools outside a controlled lit studio and this Photoshop tutorial will guide you through all steps needed. This is tutorial for intermediate/advanced Photoshop users. I intentionally do not include beginner level details to make a workflow simple and straightforward.
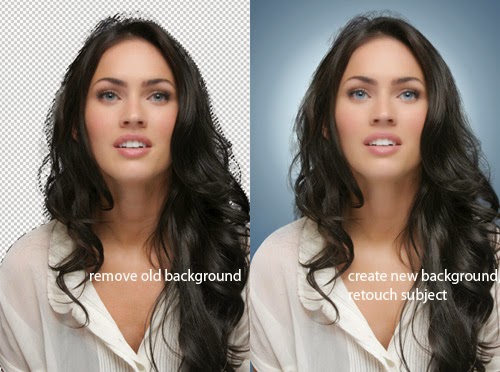
1. Remove background
To start with Jill Greenberg look Photoshop tutorial, you need to select your subject and remove background. Make sure you do this step as well as next very carefully and accurately.
2. Create new background
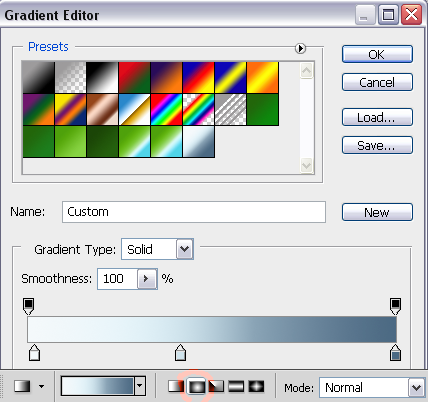
Use Radial Gradient tool and gradient from blue to white to create look of backlit photo. Don’t forget to create new layers for every step.
Start by reducing noise and using magazine style Photoshop tutorial, specific plugin or this Photoshop action. Then smooth skin, select and increase saturation of eyes.
This is the most important step in this Photoshop tutorial to create Jill Greenberg look. Done correctly this creates a soft high-pass look without the use of shooting with a ring light.
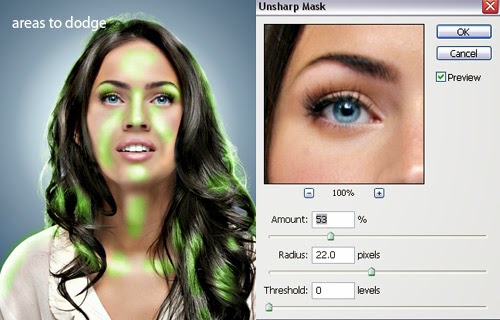
In this step you basically need to dodge light areas and burn dark ones. Though sometime you need to lighten dark areas as well.
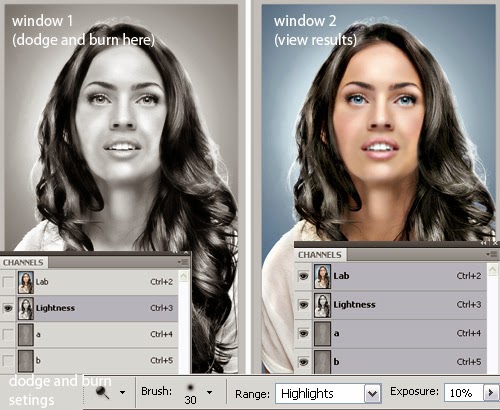
Switch to Lab mode, select Lightness channel and paint with Dodge tool light areas and with Burn tool dark ones.
Select Highlights in tool palette if you’d like to lighten and Shadows if you need to make lighter dark areas. Exposure settings should be in the range 5-15% To accentuate any area paint it several times. highlight Hair, cheeks, and other area logically and naturally to be lightened or darkened. Return to RGB mode.
Important: to view results of your work in full color while you’re dodging and burning in Lightness channel create new Window (Window->Arrange->New window) and select all channels for this window.
Use Unsharpen mask with Amount 53, Radius 22 to increase local contrast in the photo.
Sharpen photo like a pro using Highpass filter. You’re almost done.
7. Slightly reduce Saturation
Using Hue/Saturation tool, reduce Saturation to -10. This will make colors smoother.
Jill Greenberg look Photoshop tutorial before and after
